INSTRUCTIONS - Reassembly of Alto Saxophone Palm Keys
Before You Start
⚠️ WARNING: CHOKING HAZARD
Small parts—Not for Children under 6 yrs old. Buyer assumes all risk of use of this product.
![]()
Questions?
If you have questions about this or any product, please contact us and we can will help.
STEP 1 Find your storage box and tools
Locate your saxophone key storage box. If you do not remember the storage location:
1) Search your email for the words "box containing your saxophone keys" and you may find the original google forms email with the info you provided.
2) Email us asking for a reminder and we will use your email address to find the location info you provided at time of key removal and email you that info. Please allow 1-2 business days for response.
Included with Your original kit:

Not included:
STEP 2 Prep your work space

2a. Lay your saxophone body on a clean table as shown. Notice the three tone hole covers highlighted here at the top of the sax body.
2b. Open the storage box and lay it next to your sax.

2c. Using your fingers, gently pull the 3 tone hole covers off the sax. These can be placed back inside the storage box.

2d. Use a moist paper towel to clean any residue in and around the tone holes. Be sure to remove oil or dirt around the tone hole edges and surrounding surface.
STEP 3 Locate key storage bags

3a. Inside the storage box, find the High F palm key storage bag. It is the largest of the three palm key bags.
3b. Carefully open the F Key storage bag and remove the key and screw rod. The screw rod should be stored inside the key hinge tube in the same direction you will reassemble the key onto the sax.

3c. Find a screwdriver that best fits the screw rod. Two screwdriver sizes were provided with the kit and look like this.
STEP 4 Attach key to your saxophone

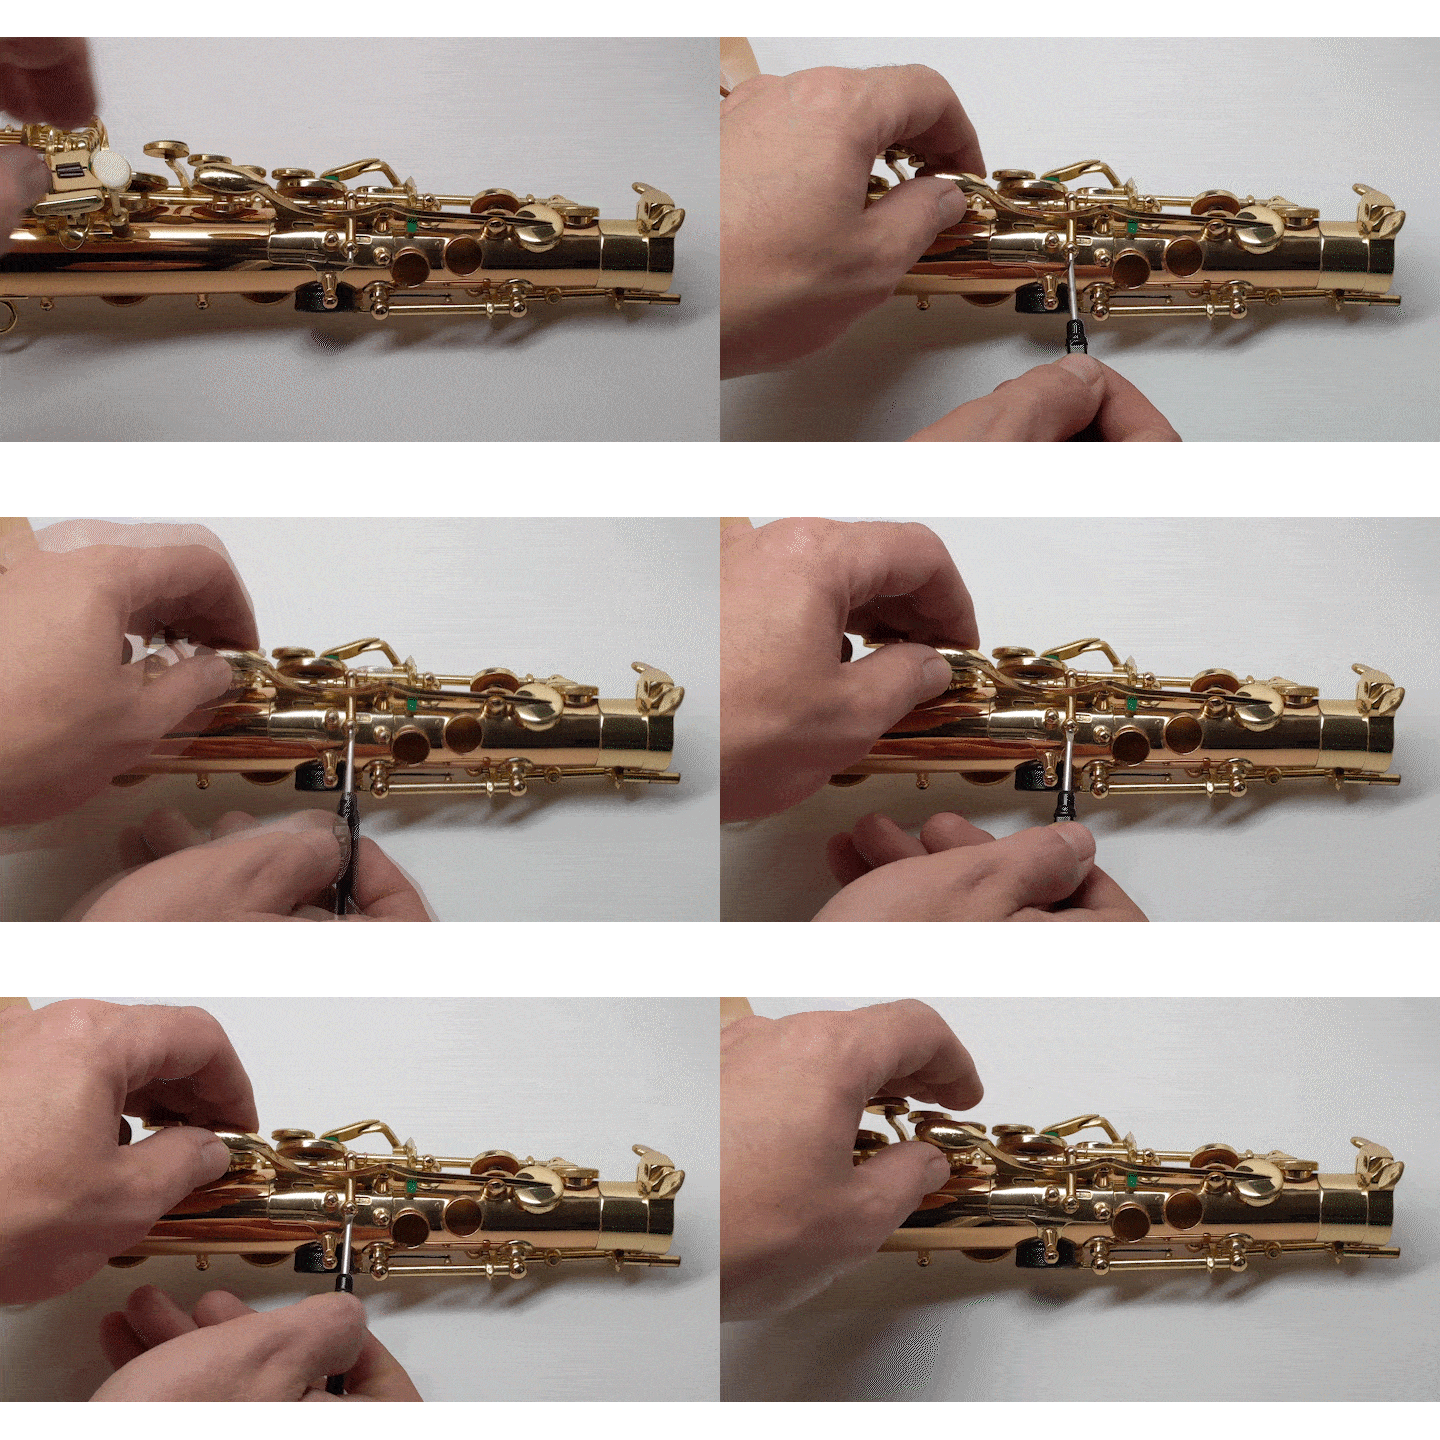
4a. Using the diagram on the key bag and the image above, find where the Palm F Key goes onto the saxophone between two posts.

4b. Place the key onto the sax key posts as shown and insert the screw rod through the posts.

⚠️ Caution! Never place your holding hand by the screwdriver tip.

⚠️ Put your hand away from the screwdriver tip so your hand cannot be hit if the screwdriver slips. Make music, not medical bills!


⚠️ Caution! If the screws on your saxophone will not screw in, softly wiggle the key while pushing and turning the screw. If this does not work, gently wiggle the key hinge tube. If this does not work and you cannot reassemble the screws, take your saxophone and all parts of this kit to a professional repair shop. Your saxophone may have mechanical problems that require professional care. Our sister company, Key Leaves, has a list of quality music stores near you.
STEP 5 Check that flat spring is placed correctly

5a. Check that the flat spring connected under the key is placed directly under the the key arm to help close the palm key pad.

⚠️ Look at the top of the key, and make sure the flat spring is not to misplaced to the side. If so, use a screwdriver to gently slide the flat spring back under the key.

5b. Test key operation up and down to see if the flat spring fully closes the key pad.
STEP 6 Assemble other palm keys

6a. Repeat steps 4 through 5 for the D# palm key.

6b. Repeat steps 4 through 5 for the D palm key.

6c. Check the spring and key operation for all palm keys to make sure the pads are closing.
STEP 7 Celebrate!!!
You just prepared your sax to play all the high notes!
